Game Info
Duration of the project: 6 weeks
My team: Cate Keenan (Design), Daniel Hill (Design), Nathan Hiscock (Computer Games Design and Development), and Zak Roberts (CAD)
Type of game: 2D platformer
Target audience: 11-15 year old children
Plot: Lilith is a cyborg who has woken up 100 years later in a world destroyed by an evil character called MegaWatt
Aim of the game: fight enemies, collect rubbish and make world greener
Lilith Design
During the first week of the project the entire team was very involved into discussion of who would be our main character and what would be the world of the game. The collective decision was to set scene in the postapocalyptic future world in which player would control a robot who would try to make the world a nice place to live in. However, later we changed our mind and decided to turn our main character into a cyborg called Lilith. She was protecting environment until an evil scientist created MegaWatt to defeat her. MegaWatt managed to win by switching Lilith off. But 100 years later she was switched back on by one robot who ran into her accidentally. Lilith wakes up and the story begins!
The creation of design of the main character is a huge responsibility but I have volunteered to try my skills and draw Lilith. It was quite a big challenge as this whole activity was very new to me but I started to work on it.
First, I drew a sketch of Lilith. (Yes, I promise to never ever use lined paper for sketching again!)
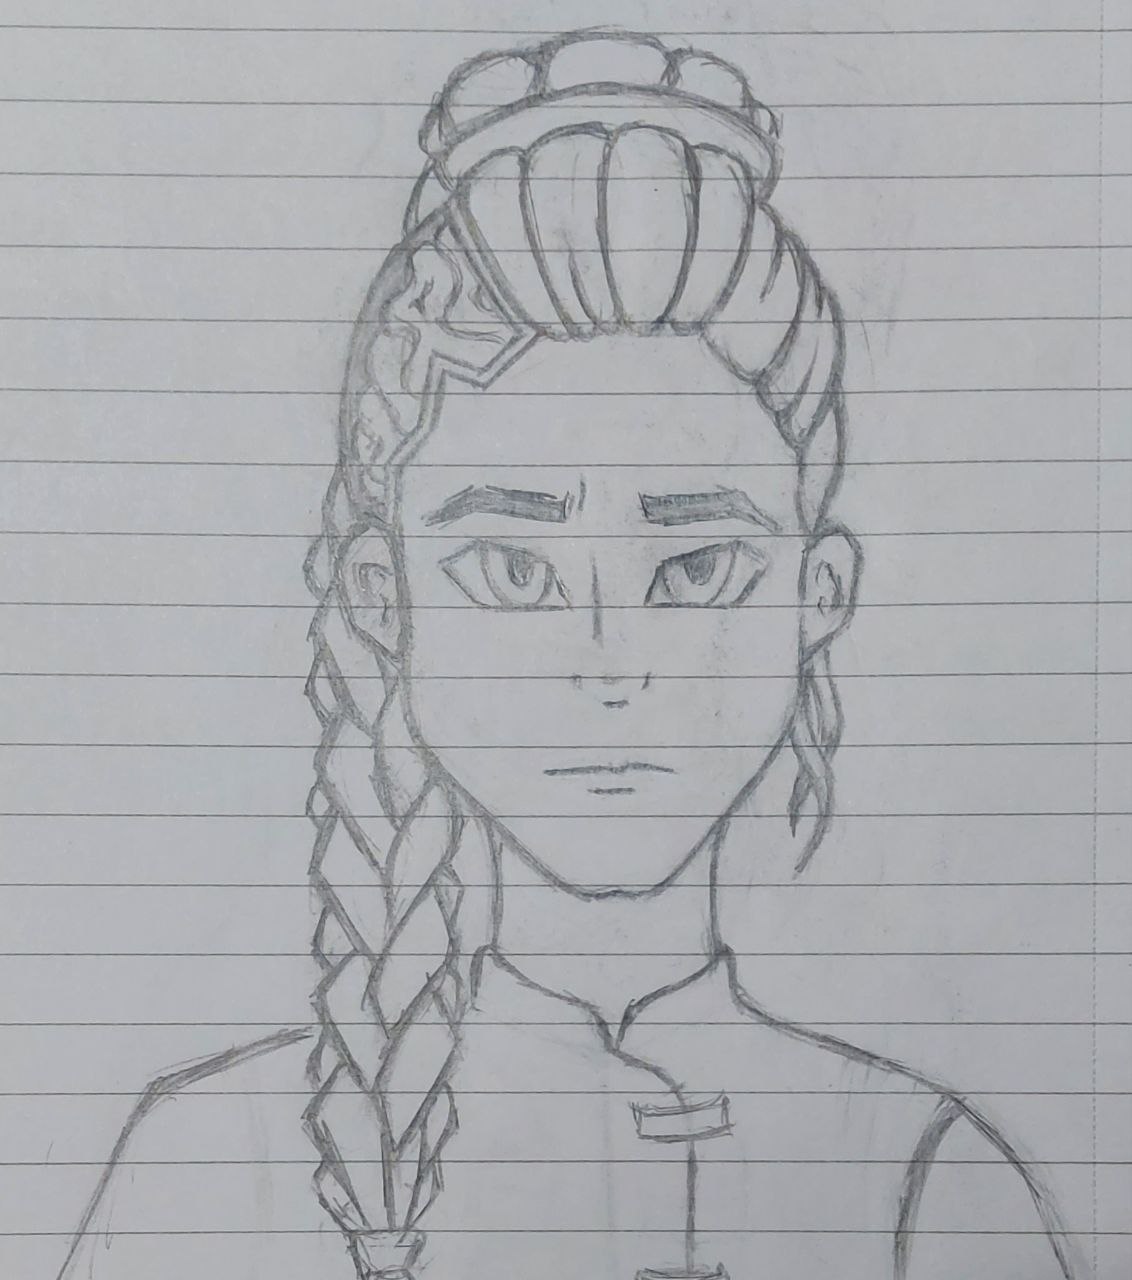
Sketch of Lilith
When the sketch was ready, I introduced it to my teammates and shared my ideas about its further development. After agreeing on all details, I started working in Illustrator trying to turn my sketch into a digital picture. When I managed to do that, I decided to draw Lilith in different styles so that I could decide with my teammates which one would suit the atmosphere of our game the best.
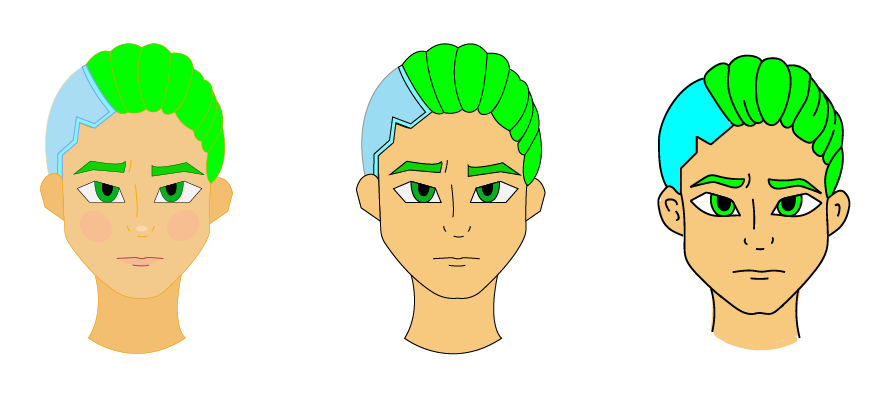
Different drawing styles of Lilith
After finishing this step and getting encouragement from my teammates, I decided to add some details to Lilith appearance to make her look more interesting and attractive for target audience. So, I've designed three alternatives to choose from.
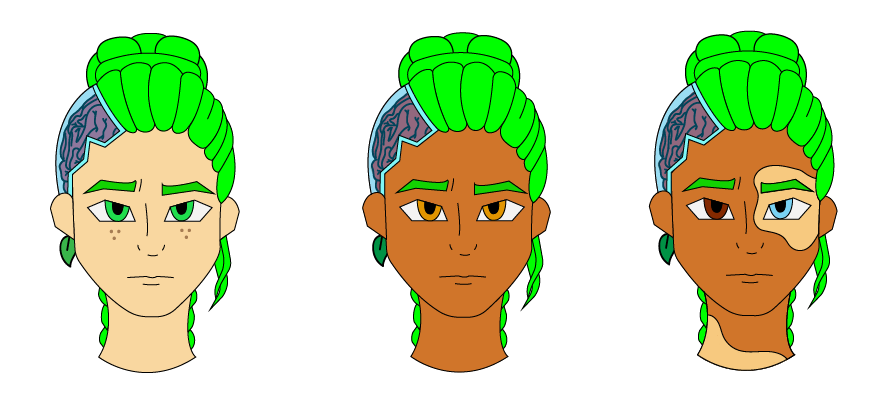
Alternative appearances of Lilith
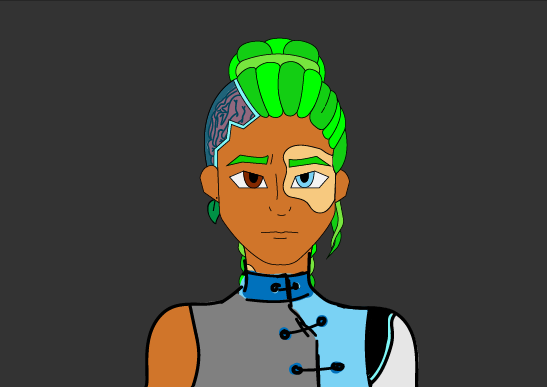
At this stage it was more difficult to make a collective decision because my teammates had different opinions about what would be the best option. So, I consulted other people and made research as a result of which I found out that in media characters who look differently from the majority of people or have some peculiarities about their appearance are usually shown as villains (for example, in James Bond films). So, we have decided that it is critically important to show our target audience that people with unusual appearance can be positive characters as well. Based on this logic, we chose the most unique appearance.
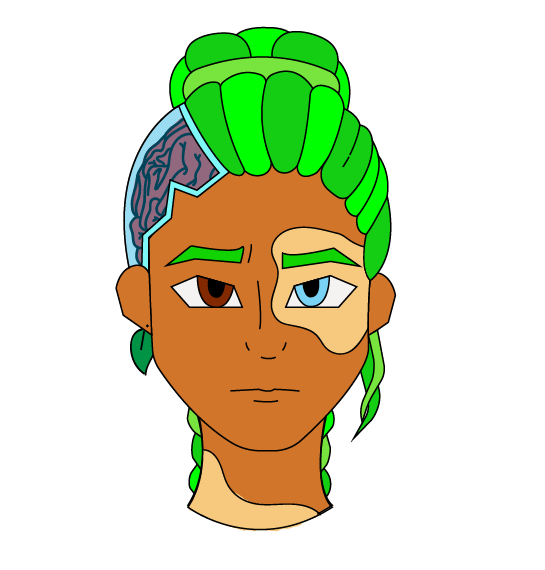
Final appearance of Lilith
Next step was the creation of the outfit. But before that I decided to make a couple sketches of Lilith's arm as we wanted one of them to be artificial. I drew a robotic arm and an eco-friendly-looking liana arm.

Arms sketch
As always, I presented this sketch to my teammates to choose which one we see Lilith with, but in process of discussion we decided that both of them are good so it would be nice if at some point in the game Lilith could change them as an upgrade which would introduce new game mechanics. Everyone agreed on this idea, so I had to create two outfits. The basic one and the upgraded one. It became a new challenge for me, but I successfully coped with it. Due to the lack of time, I did not put extra effort in making neat outlines of the body because I just needed to create a finished image so that Lilith funko pop created by Zak and Lilith from comics created by Cate and Deniel would look the same. For the game development itself it didn't have any practical usage, so I decided not to waste time on that.
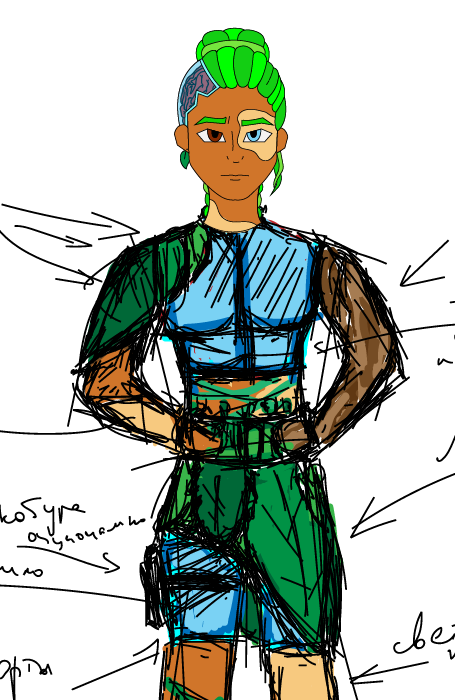
Very rough outfit sketch
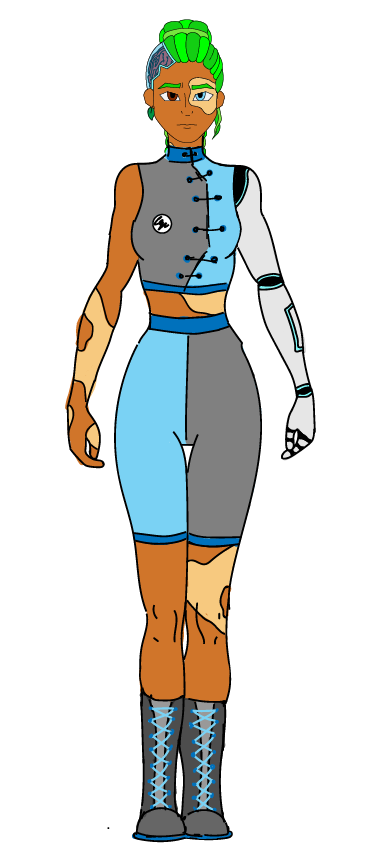
Basic outfit
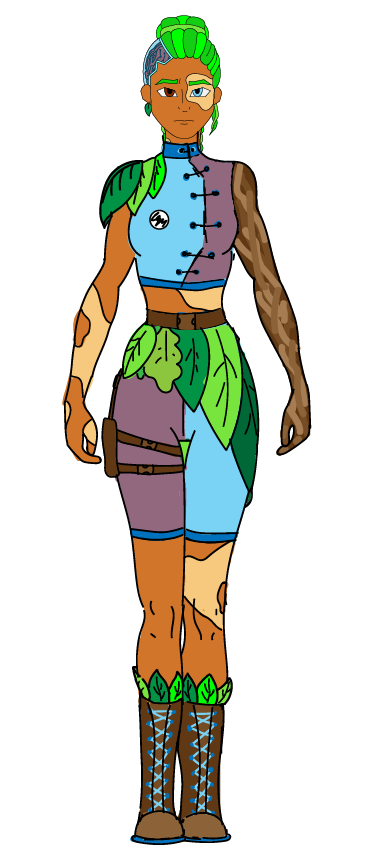
Final fully upgraded outfit
World Design
As my team didn't have a 3D student, we decided to make our game a 2D platformer. Our task was to develop 1 level of the game, so I decided to share the creation of the level map with Nathan. My task was to sketch the inside area where the level would start, and Nathan had to sketch the outside area. After discussion of all the details I quickly sketched my part of the level.
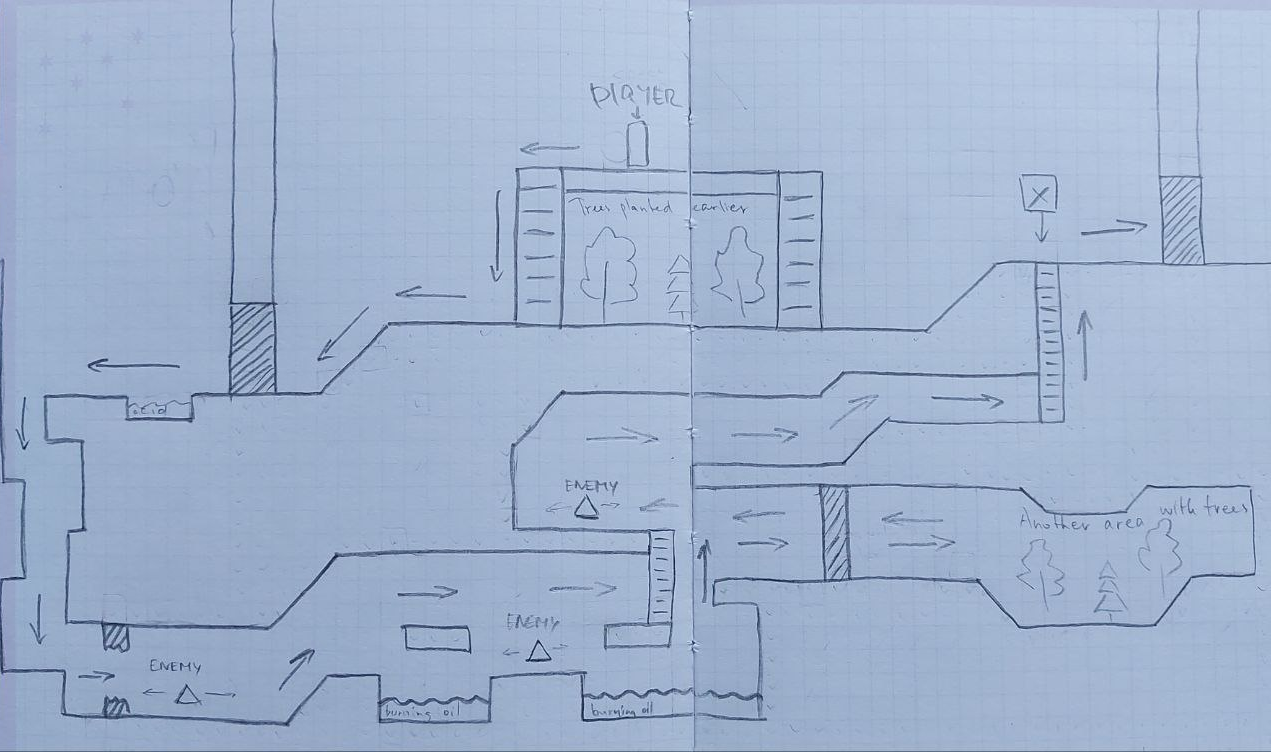
Inside area sketch
Next step was the creation of tile set. I didn't have much pixel art experience, so I had to read some articles and watch tutorials before starting my work. I learned about different pixel character sizes and useful tips about tile set creation. Only after that I started working on my tile set. It was a challenging task, but I succeeded created all basic tiles with some pattern alternatives and additional ones for acid and doors as well as background tiles.
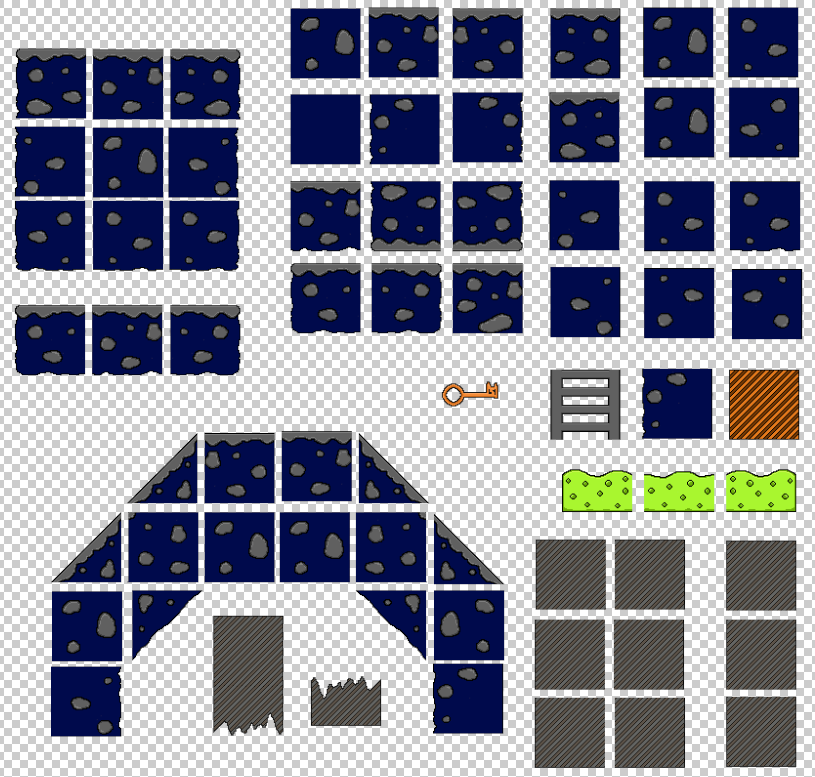
Basic tileset
Background tileset
After that I started building my part of the level in Unity. From lectures I already knew how to use Tile Palette, so it wasn't a difficult task. The only difficulty was scaling the map to the size of the character, so that it wouldn't be too big or too small for a character to move. Another thing that required a little more attention was the creation of background layer but after research I successfully completed this task as well.
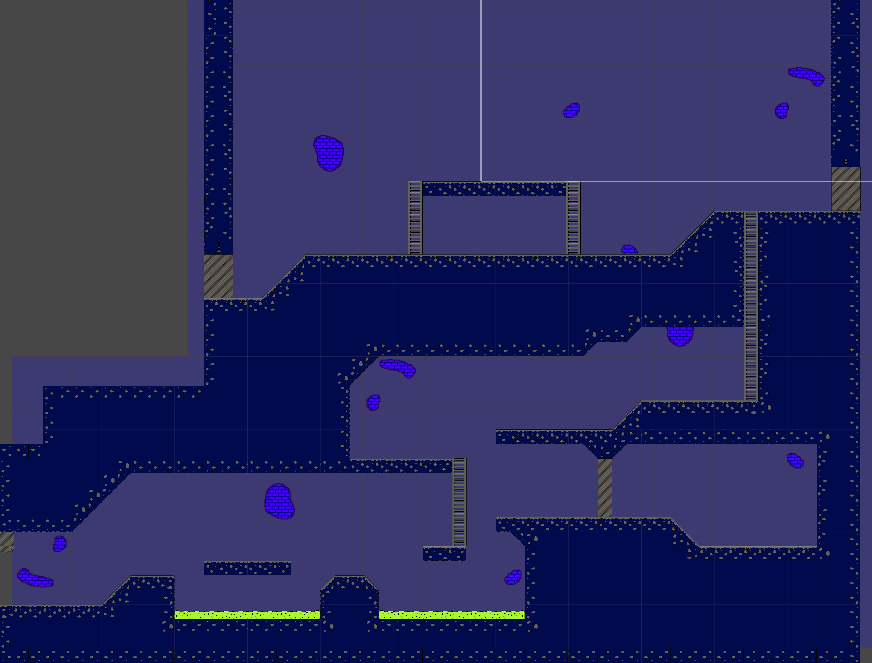
Level in Unity
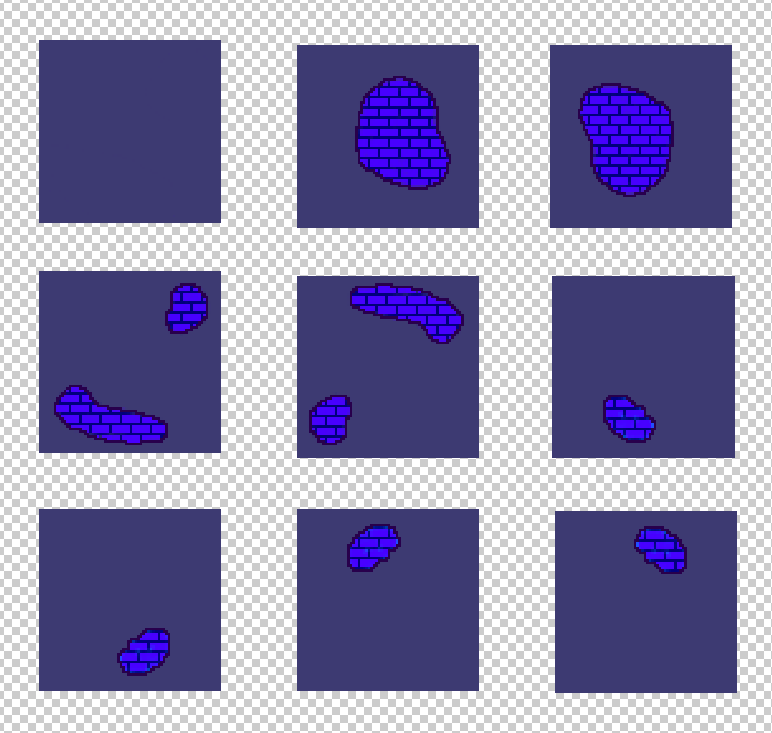
I used all the tiles including tiles for acid and doors. And only when I started coding, I've realised that I should have made them separate objects instead, so with the development of the level I created new sprites to implement new systems. And to test my scripts I also created a simple red circle that I used as temporary character sprite.
Additional sprites
Game Development
When I finished building my part of the level in Unity and created a temporary character sprite, I started coding. And the very first thing I had to write script for was movement script which would allow the player to move left-right and to jump. I didn't have perfectly working code, so I had to look into Unity Documentation and watch many tutorials to understand different approaches and choose the one that works the best for me. Finally, I wrote a script which was easy to combine with other scripts and which worked without any bugs.
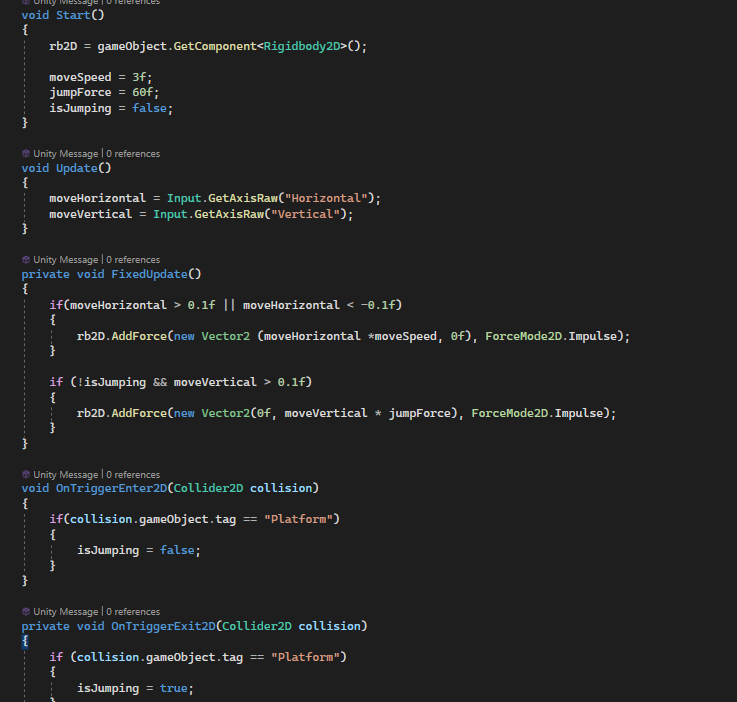
Movement code
Movement
I decided to use the tag system as it seemed the easiest from all I've seen. To make it work I assigned my Tilemap a "Platform" tag. However, later it created some problems as my player couldn't jump once getting on the acid. I looked for the source of the problem and realised that jump activates only on surfaces with "Platform" tag. I could assign it to acid as well, but it would create new problems later as I was going to make it a trap. So, I have decided to edit my code a bit and assigned "Trap" tag to acid, so that player would be able to jump and get out of acid after getting into it.
Jumping problem
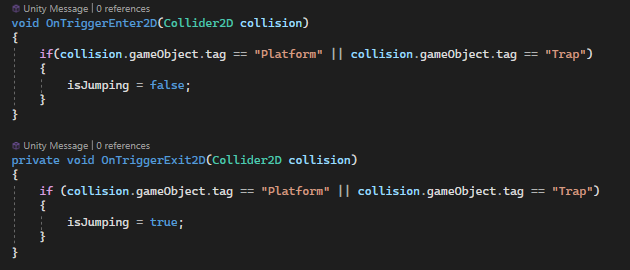
Edited movement code
Fixed jumping
Next step was to create script which would let the player to climb the ladders as they are one of the key elements of my part of the level. It was slightly more complicated than making the character move. I looked for tutorials and tried codes from them failing a couple of times. But I kept on trying and finally wrote the code that worked for me.
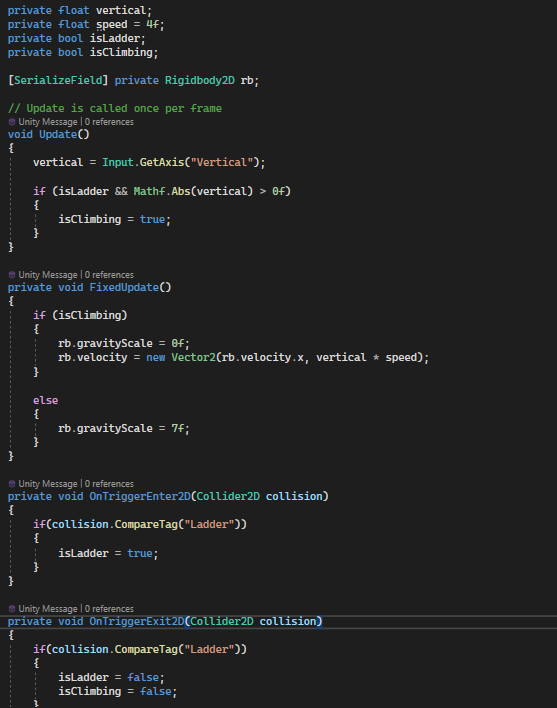
Ladder movement code
Ladder movement
Now that the player could move and climb the ladders, they could use the entire map, but it would be rather boring if there wouldn't be any traps on the way, so my next two steps were to create health system and make acid cause damage. I started with the creation of health system and for it I needed a heart sprite which I quickly created and placed in Unity. The idea was to make a 3-heart system in which player would lose 1 heart after falling into a trap. I've watched plenty of tutorials. The creation of such health system wasn't very difficult unlike triggering the script exactly when I needed it. I was very puzzled with this task, it turned into a real challenge, however, I found the way to fix the problem. It wasn't perfect solution, but it worked which was a huge progress in that situation.
In Unity I created Canvas and Hearts Container where I placed three hears. I created Health Manager script which didn't destroy hearts but replaced them with empty sprites and Player Collision script which would trigger Health Manager script every time player runs into a trap. In such way I avoided creation of separate script for acid. Also, I created Player Manager script which would trigger previously created Game Over Screen and send character back to the start of the level.
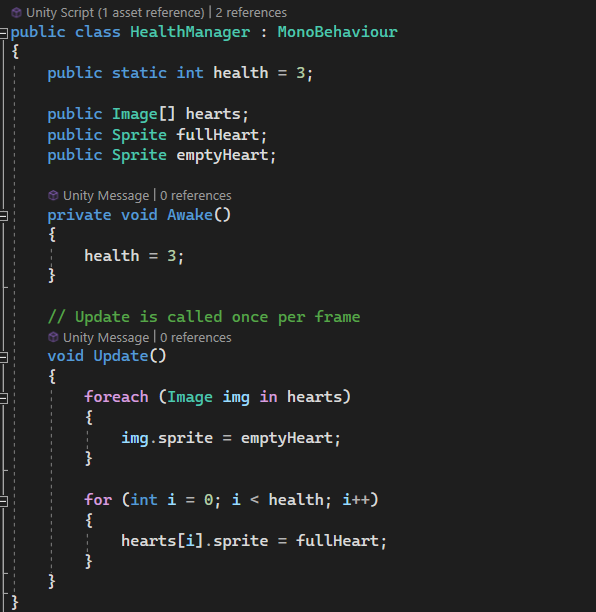
Health Manager script
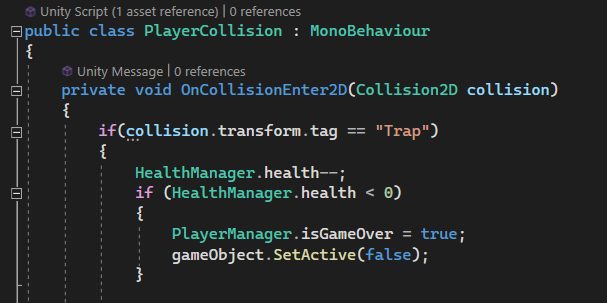
Player Collision script
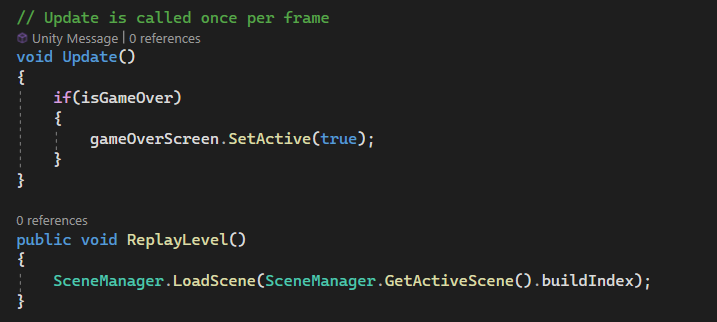
Player Manager script
Health System
With Health System 'Lilith' became a little more entertaining but I decided that it would be annoying to respawn back at the beginning, so I created the Checkpoint System. I started from creation of checkpoint sprite. To avoid extra time waste on creation of inactive checkpoint sprite I decided to write a Checkpoint script which will automatically change the colour. Also, I've edited my Player Manager script adding the start coordinates where the player will go after death without reaching the first checkpoint.
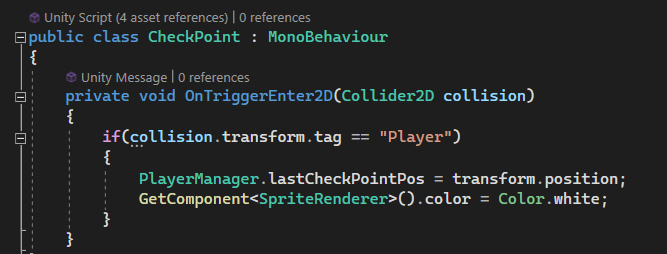
Checkpoint script
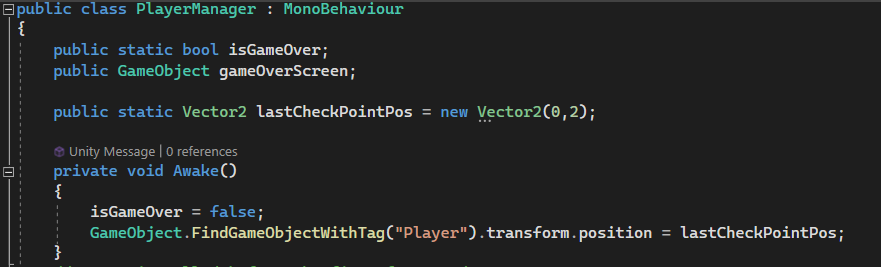
Edited Player Manager script
Checkpoint System
One more thing I decided to make was Door System so that the player would get an access to outside part of the level that Nathan created. For some reason it was quite difficult to find tutorials to that type of the door that I was planning to have but after a few failed attempts I managed to write a working script and fix all the issues which appeared in the process. Once the player collects the key, the door will open automatically. I used this script just on one door but it's possible to extend the code and use door as prefab defining necessary key for it by colour.
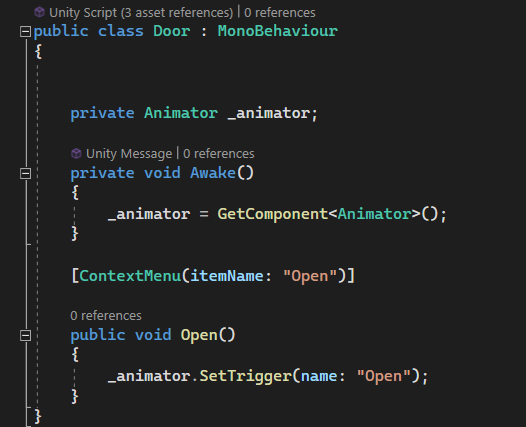
Door script
Door System
Here's a little video summary of all scripts working together!
Summary
Reference List:
- https://www.youtube.com/watch?v=w9NmPShzPpE
- https://www.youtube.com/watch?v=yyg0yV2roPk
- https://www.youtube.com/watch?v=mBn7ZIB5Zhw&list=PL0WgRP7BtOezfnz3lPmbs1X6dOu1YsbPh&index=25
- https://www.youtube.com/watch?v=mBn7ZIB5Zhw&list=PL0WgRP7BtOezfnz3lPmbs1X6dOu1YsbPh&index=25
- https://www.youtube.com/watch?v=1IJmenD1HOk&t=222s

