Project Info
Duration of the project: 6 weeks
My team: Archie Prince (Computer Games Design and Development), Alex Chaffey (Design), Bradlee King (Development), Cate Keenan (Design), Karine Nakane (3D)
Type of the project: interactive, educational, VR
Target audience: those who want to learn more about visual impairment and blindness
Game plot: you will dive into world of darkness and will discover it by touch with the help of echolocation
Aim of the project: educate people about blindness and visial deprivation
Game Research
The “Invision” project was very interesting and exciting, as well as complex and challenging in many ways, so the first two weeks my team spent on research. We had to figure out what types of interactive game projects exist and what technology is used for such projects. Additionally, we had to think of a way to implement Arduino electronics as it was the condition of Bradlee (second-year development student) to join our team. So, after a brainstorming session we finally made up our mind and polished the project’s idea.
“Invision” is a VR escape room-like project aimed to make people think how much vision influences on our perception. With the help of this project people will be able to gain a unique experience by exploring room by room by touch. But, as it is a VR project, we decided to add echolocation effect and objects lightning (Fresnel Shader) to help our players navigate in total darkness.
Our main inspiration became one of the existing projects which I discovered at the idea polishing stage.
“Blind” is a VR game with similar mechanics to those we planned to use. It greatly helped my team to visualise the desired result, however, the “Invision” is quite different from it due to the limits of time and experience.
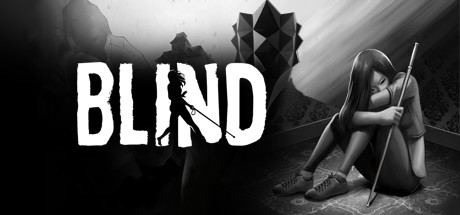
"Blind" poster

"Blind" preview image
"Blind" poster
"Blind" preview image
Game Development
As my team decided to go with a Virtual Reality project, I had to conduct research about this system, its functions, advantages, and disadvantages. I did not have any previous VR experience at all, so it took me long time to learn the basics of using a VR headset and developing a VR project.
As there was one more developer in my team, we had to share our responsibilities. My tasks for this project were creation of a movement system, echolocation effect, Fresnel Shader, and custom renderer.
So, I started my work from basics such as movement and turns. And the very first challenge I faced was a huge lack of VR project development tutorials. Or, more precisely, their uselessness as almost all of them were referring to much older versions of Unity which didn’t have all necessary functions for the “Invision”. This had a huge impact on my efficiency and individual time management. However, once I improved my general understanding of VR development technics, I managed to complete my first task.
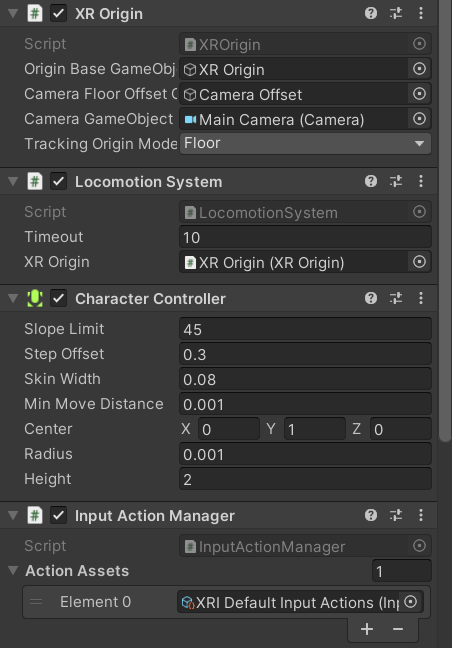
Movement and turn settings
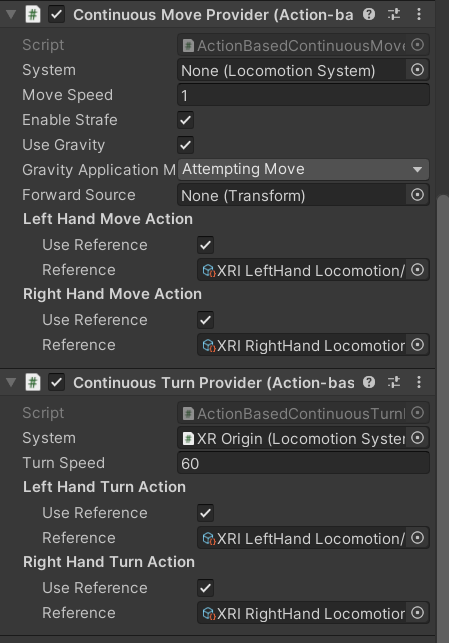
Movement and turn settings
Movement and turns
The second task was the creation of Fresnel Shader. Probably, it was one of the easiest tasks, though it resulted in many problems with Unity version choice as it was critically important to find one with all the VR options and modern Unity Shader Graphs. The version that fit this project’s requirements the best was Unity 2021.3.11f1. After I checked it for all the necessary components, I built a Fresnel Shader with adjustable colour and range setting.
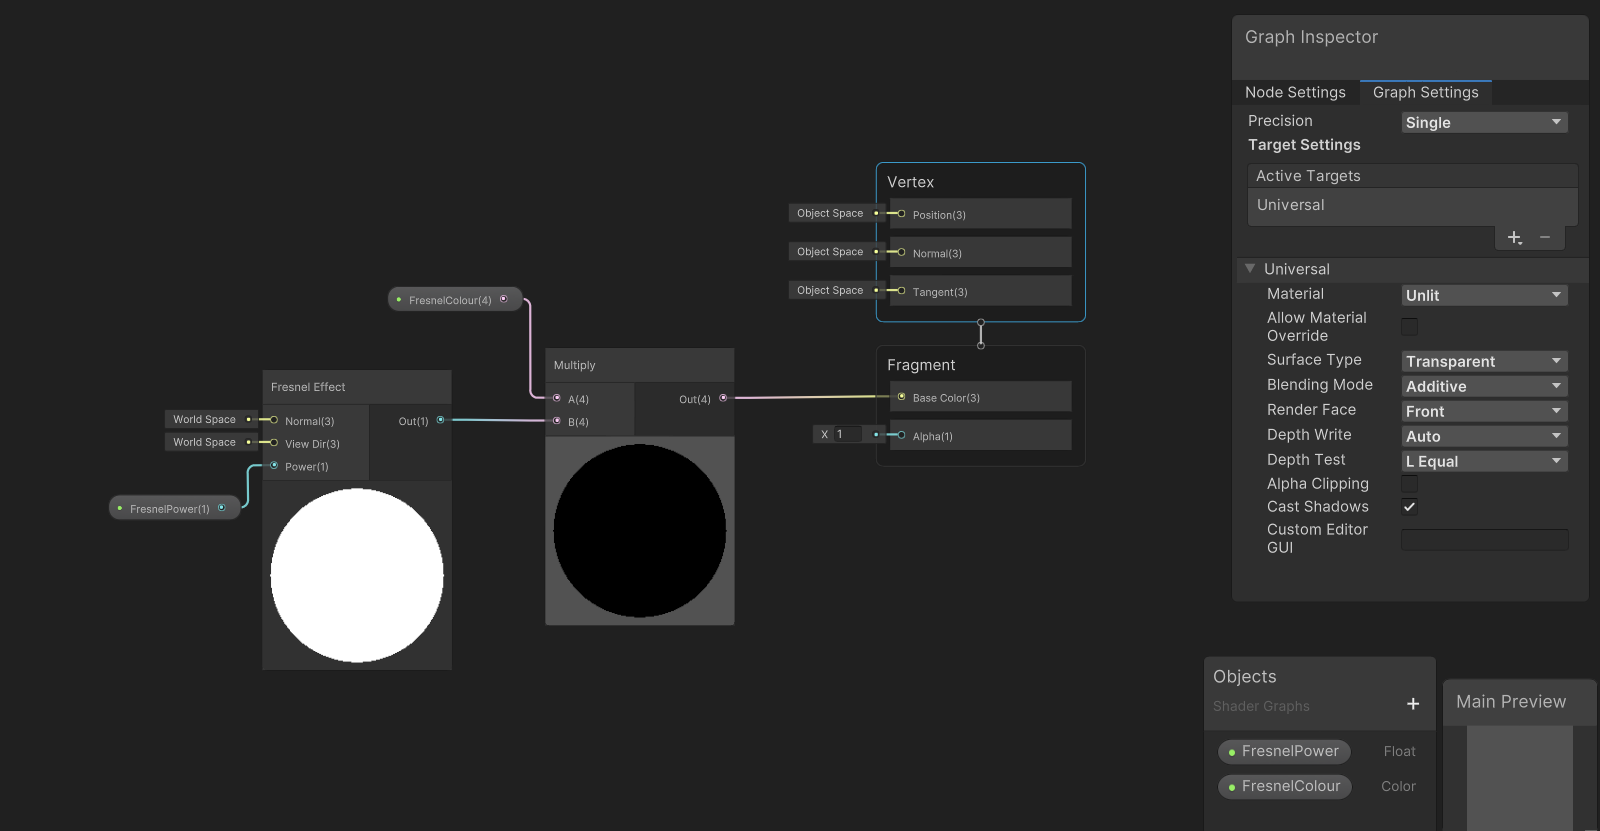
Fresnel Shader Graph
Once it was done, I decided to apply it to the table* which I chose as a testing object in earlier Unity versions. After that I adjusted the Shader the way we wanted it to be, changed controller models into hand models* and applied Fresnel Shader to them.
*All the object models used in the “Invision” project were created by Karin Nakane.
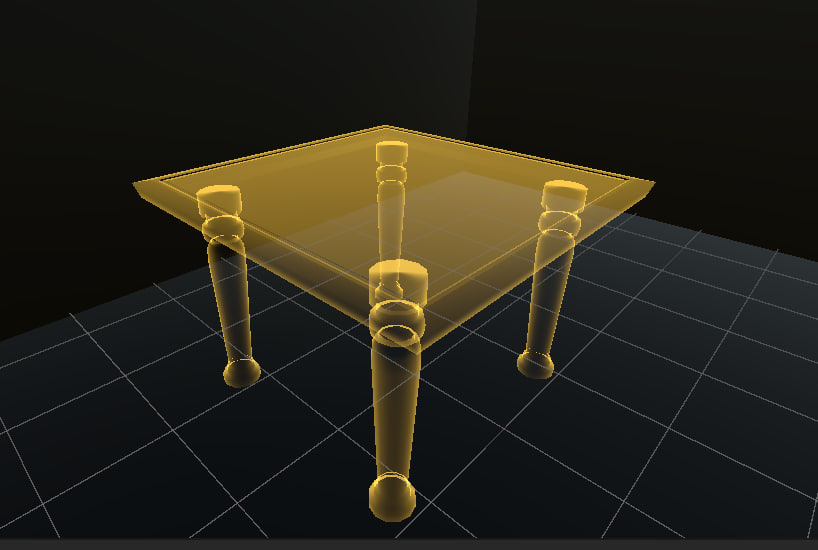
Table with Fresnel Shader
Hand models with Fresnel Shader
Next step was the creation of echolocation effect. At first it seemed an easy task but very soon I realised that there weren’t any new specific tutorials for such a thing, so I had to research what alternatives I could use. Among my options there were shockwave, ripple system and scanner effect. The last one turned out to be the best. However, it wasn’t easy to find a proper tutorial, so I had to look for information in other languages as well. Luckily, I found what I was looking for, however, later in the project I had to change the script for the echolocation effect as we didn’t need such a big wave which I successfully did with teachers’ help.
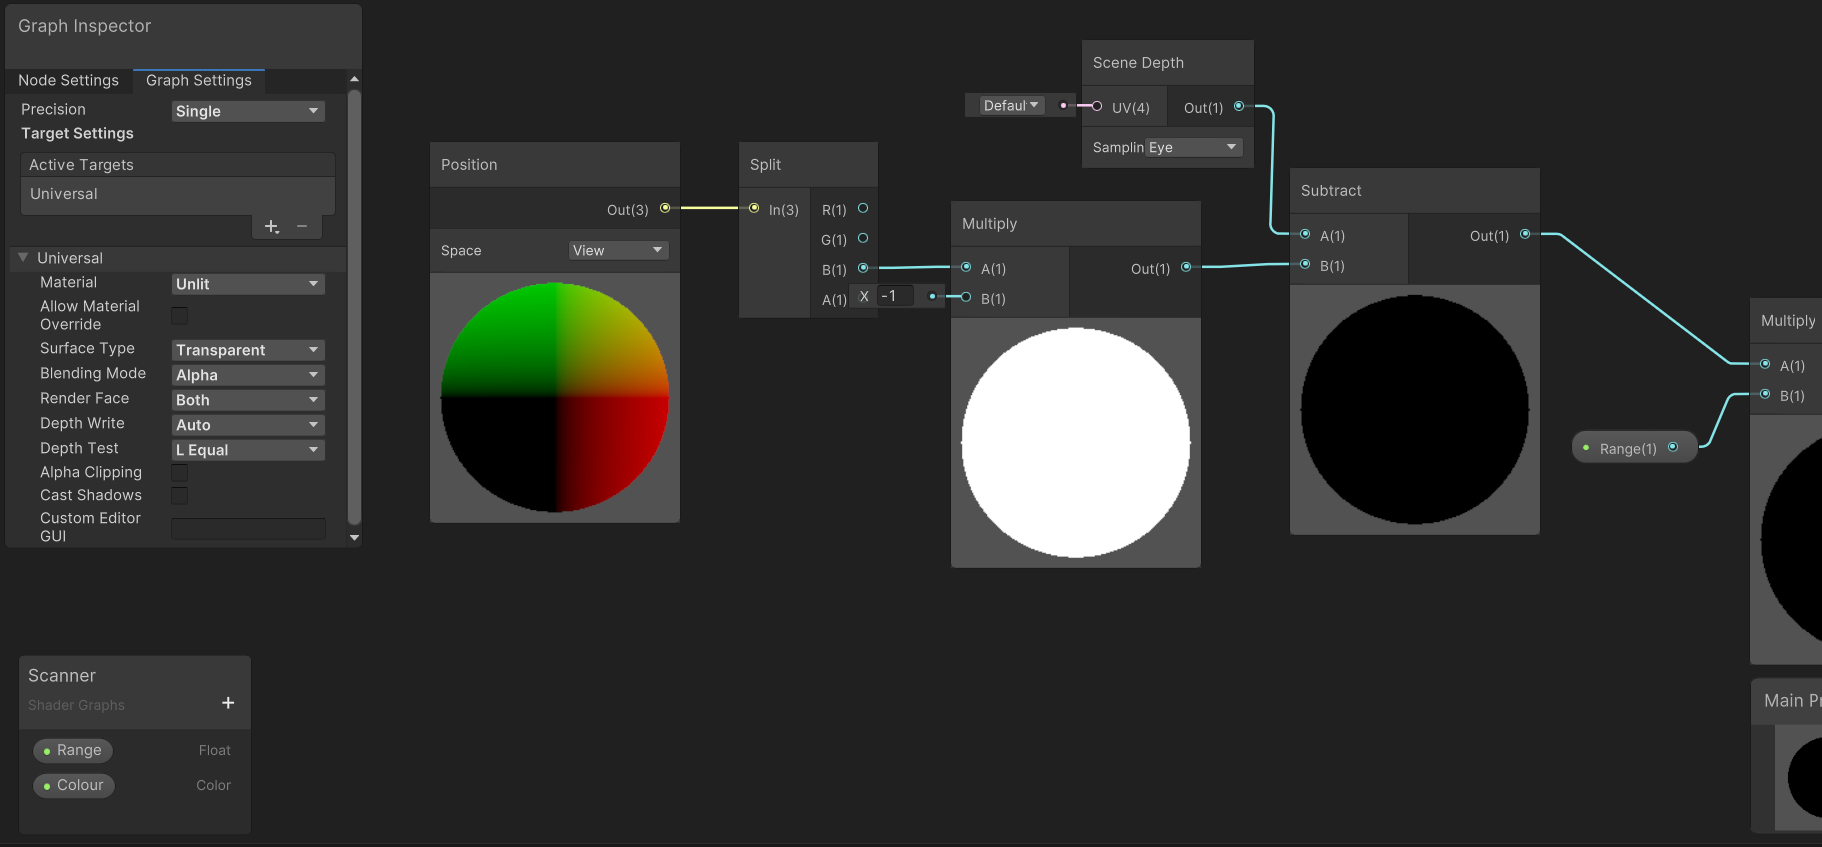
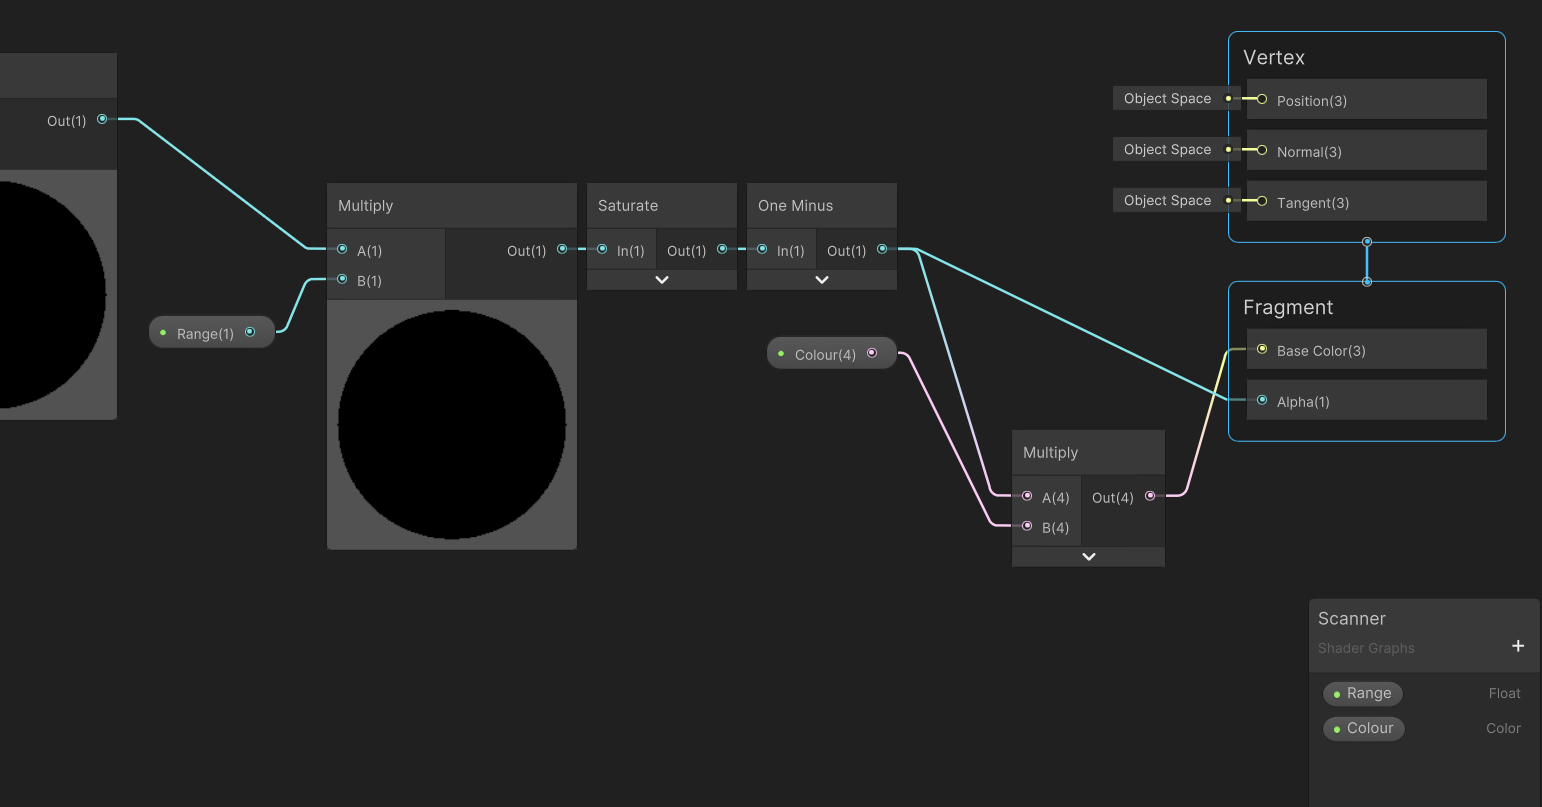
Echolocation effect Shader Graph
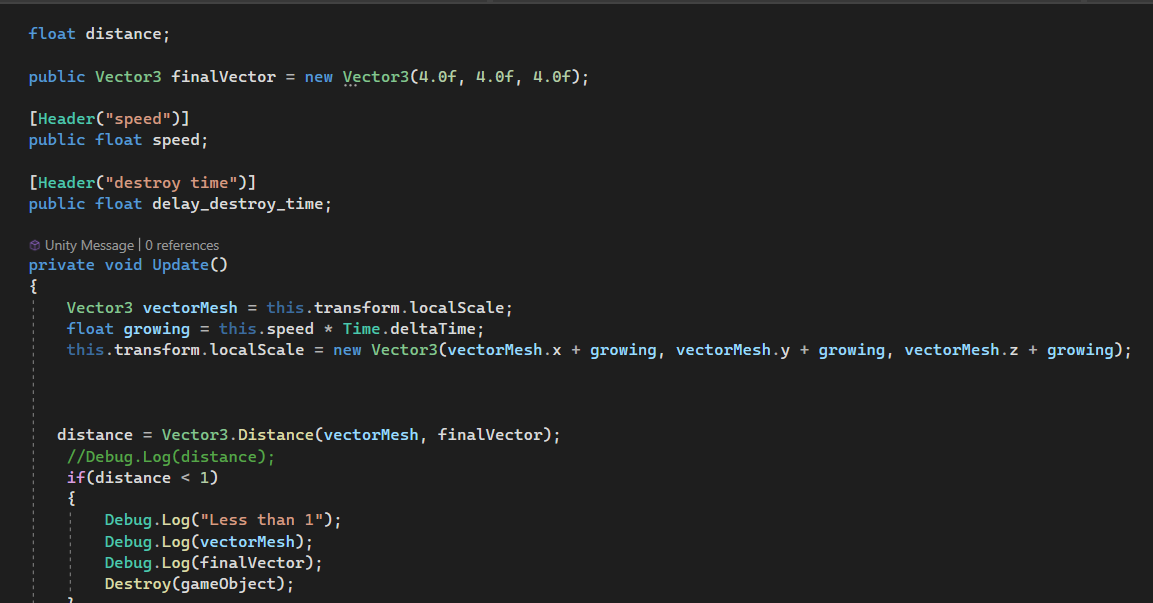
Final echolocation script
Echolocation effect
Additionally, I developed a basic UI as I had to test it together with the echolocation because this effect should trigger a menu with options, so that player would be able to guess the object. The idea is that in each room there will be three objects which player will need to identify. Once it is done correctly, next room will be opened.
The creation of UI was not difficult as I have already had an experience of making a complex menu system for the “SipPet” project. However, in the “Invision” I also had to make a hands ray system which could be used for interactions with UI. For completion of this task I duplicated controllers and changed their components in such a way that one copy won’t have rays and other one will have them.
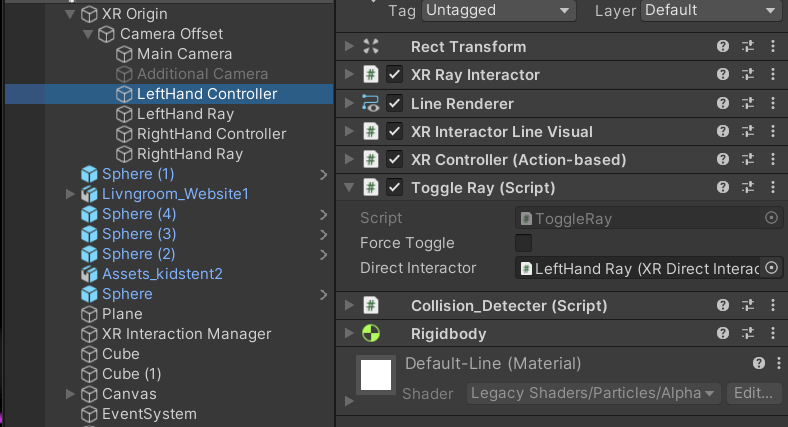
Hand controller settings
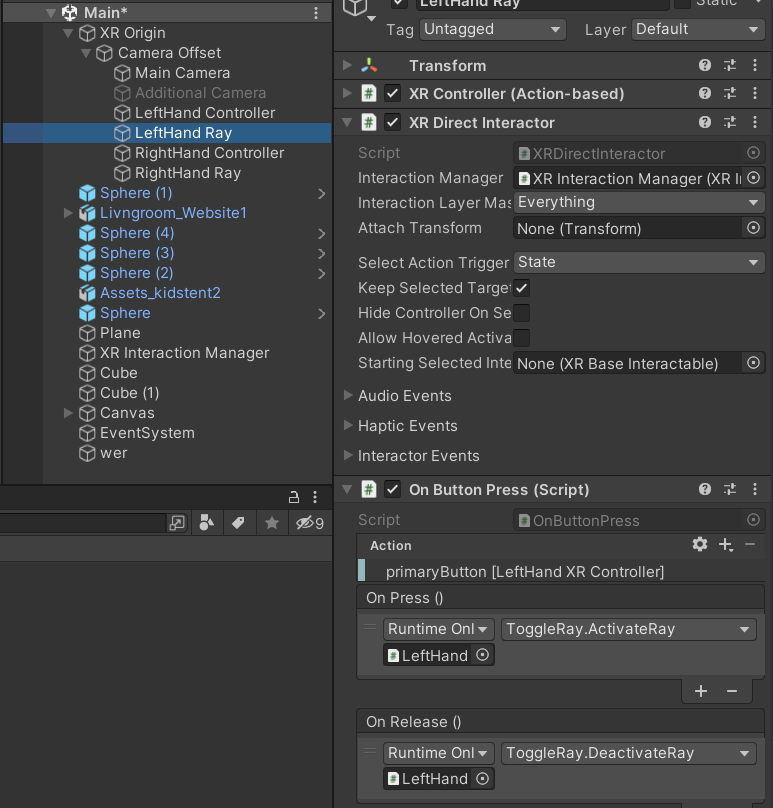
Hand ray settings
Interaction with menu
And the last task I had to do was rendering. The original plan was to add two materials (solid black and Fresnel Shader) to each object and create custom renderer which will show the needed material depending on conditions. However, I discovered that this idea didn’t really work with our project, so I had to think of a different way. Although, during my research I managed to fix one of the big problems, self-illumination of objects. Before the inside area wasn’t completely dark which was critical for the project idea but some simple setting changes fixed this creating a total darkness.
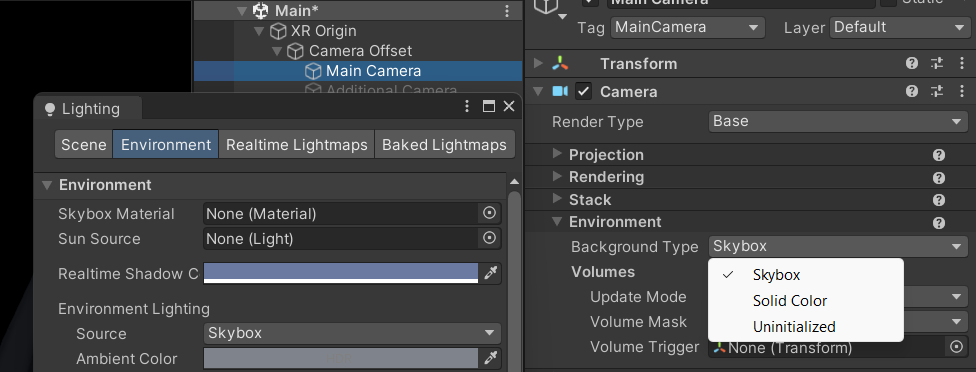
Camera rendering settings
Demonstration of camera environment changes
Later after the second brainstorming session about rendering my teacher offered me to duplicate the main camera and with the help of camera rendering settings and script control active objects and their materials. This idea turned out to be successful! I built a room, assigned each object to "Black" layer and tagged them with "Object" tag. After that I duplicated all the oblects, changed their material to fresnel shader and changed their layer to "Shader". Only three objects which player needs to identify I assigned to "Shiny" layer and tagged them as "Shiny", "Shiny1" and "Shiny2" to trigger the correct menus with options.
After that I created Additional Camera and Shiny Camera. In such a way Main Camera was set to render everything apart from Shader and Shiny layers; Additional Camera rendered everything apaart from Black and Shiny layers; and Shiny Camera rendered everything apart from Black layer. To switch the cameras I edited earlier created script which triggered Echolocation.
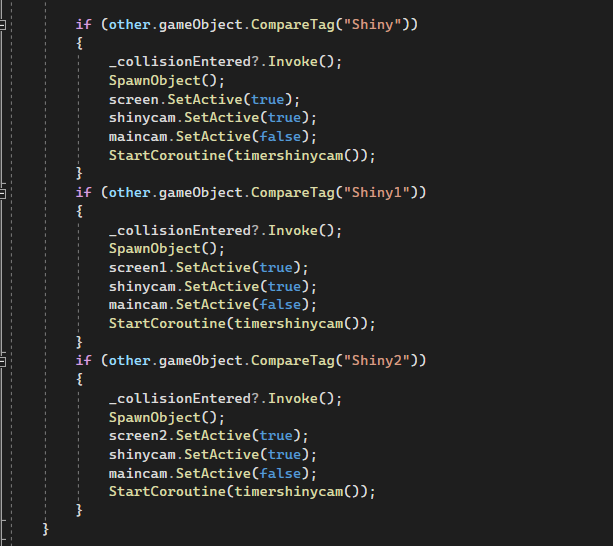
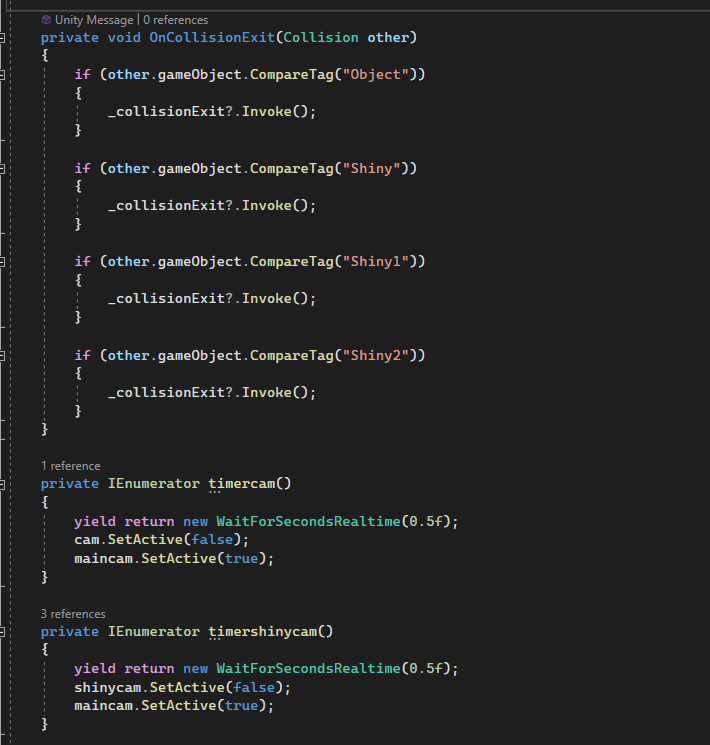
Edited script
Camera switching
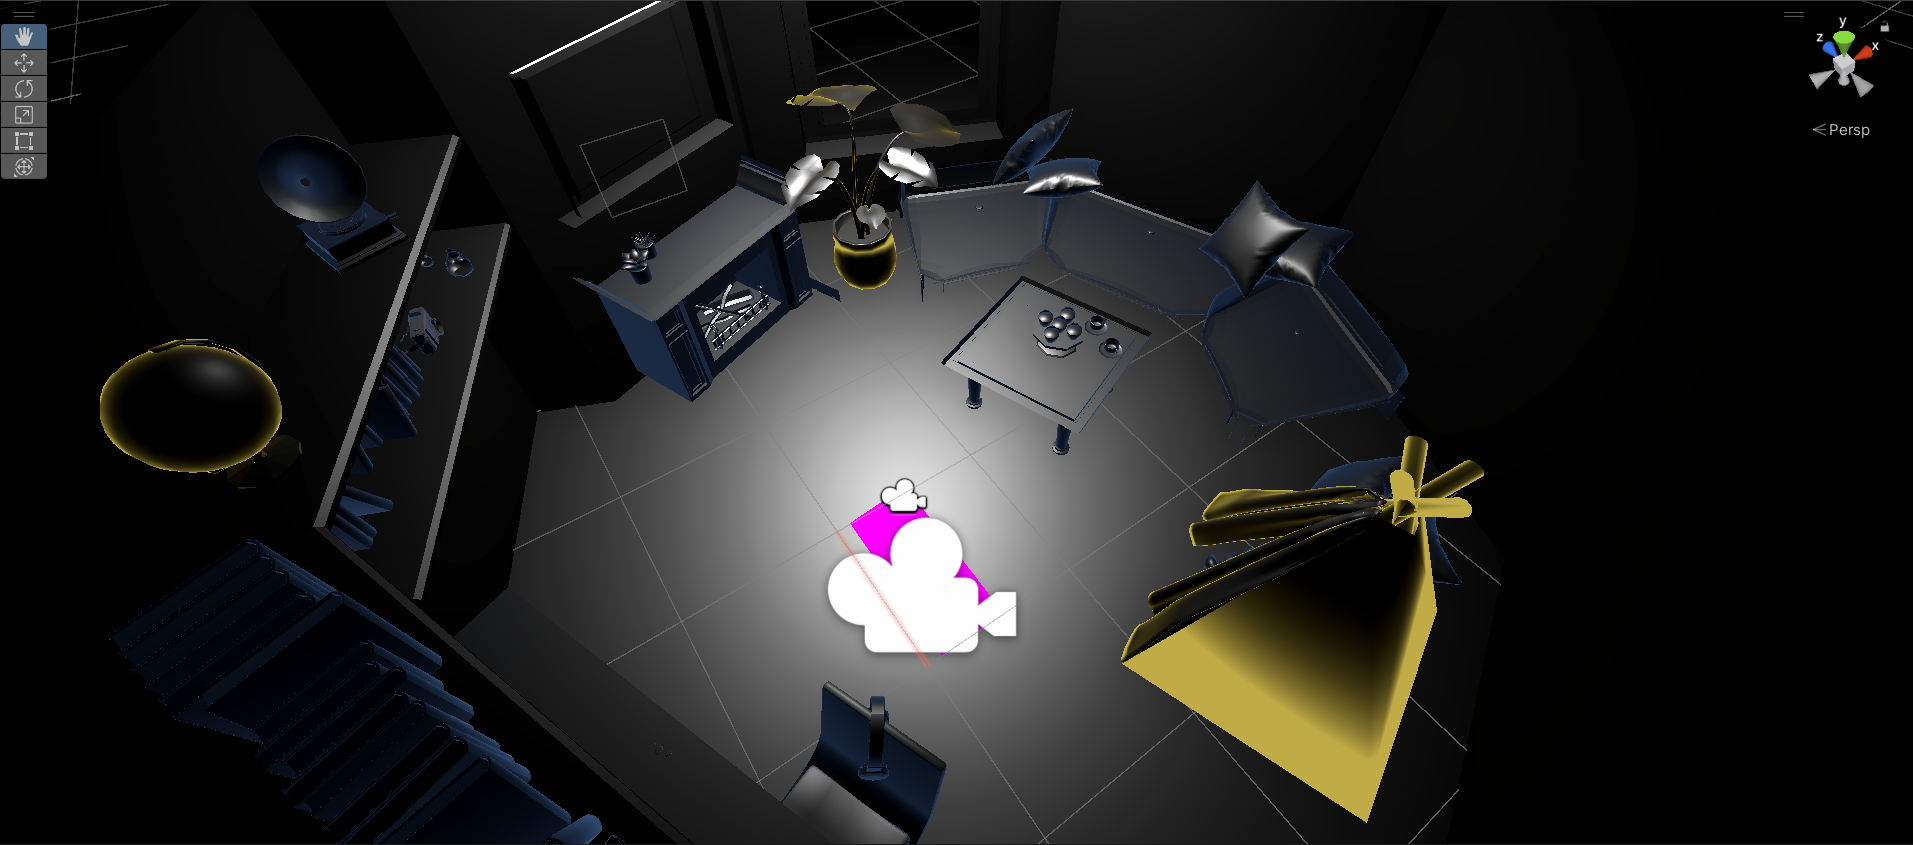
Final look of the room
Reference List:
- https://learn.unity.com/course/create-with-vr?uv=2020.3
- https://www.youtube.com/watch?v=lh3-wh85dds
- https://www.youtube.com/watch?v=p0VSWDmBEs0&t=8s
- https://www.youtube.com/watch?v=KFMOD9jLCUg
- https://www.youtube.com/watch?v=yiTF4rJu6tY
- https://www.youtube.com/watch?v=ACDZ3W-stCE
- https://blog.theknightsofunity.com/using-multiple-unity-cameras-why-this-may-be-important/

